200micron - Hand-assembled Single Board Computer

In 2016, my dad bought a Raspberry Pi Zero for $0.99 from Micro Center while on a business trip and brought it home for me as a gift. I was 9 at the time, and Googled my way through the setup process and learned the basics of Linux and higher level programming because of it. As fruitful and foundational as this experience was, I always found the hardware equally interesting than the software - the problem is that while the software is open-source, Raspberry Pi hardware design is closed-source.
Since this realization, I have wanted to design and build a single board computer from scratch that could be openly modified at every level for experimentation or education. In addition, this experience could be extremely valuable as an embedded systems expert, and help me become familiar with the complexity of creating devices that require more computational power and advanced software than microcontrollers are suitable for.
During one random Linear Algebra lecture in my first semester at GT, I decided to “just do it” already and started research and working on a schematic. During winter break and continuing throughout the semester, I designed and built three boards from scratch, and then created a full SDK and some basic project examples to demonstrate their usefulness.
Now that everything is done, sit back and enjoy the journey to creating 200micron.
Design - Schematic to physical board
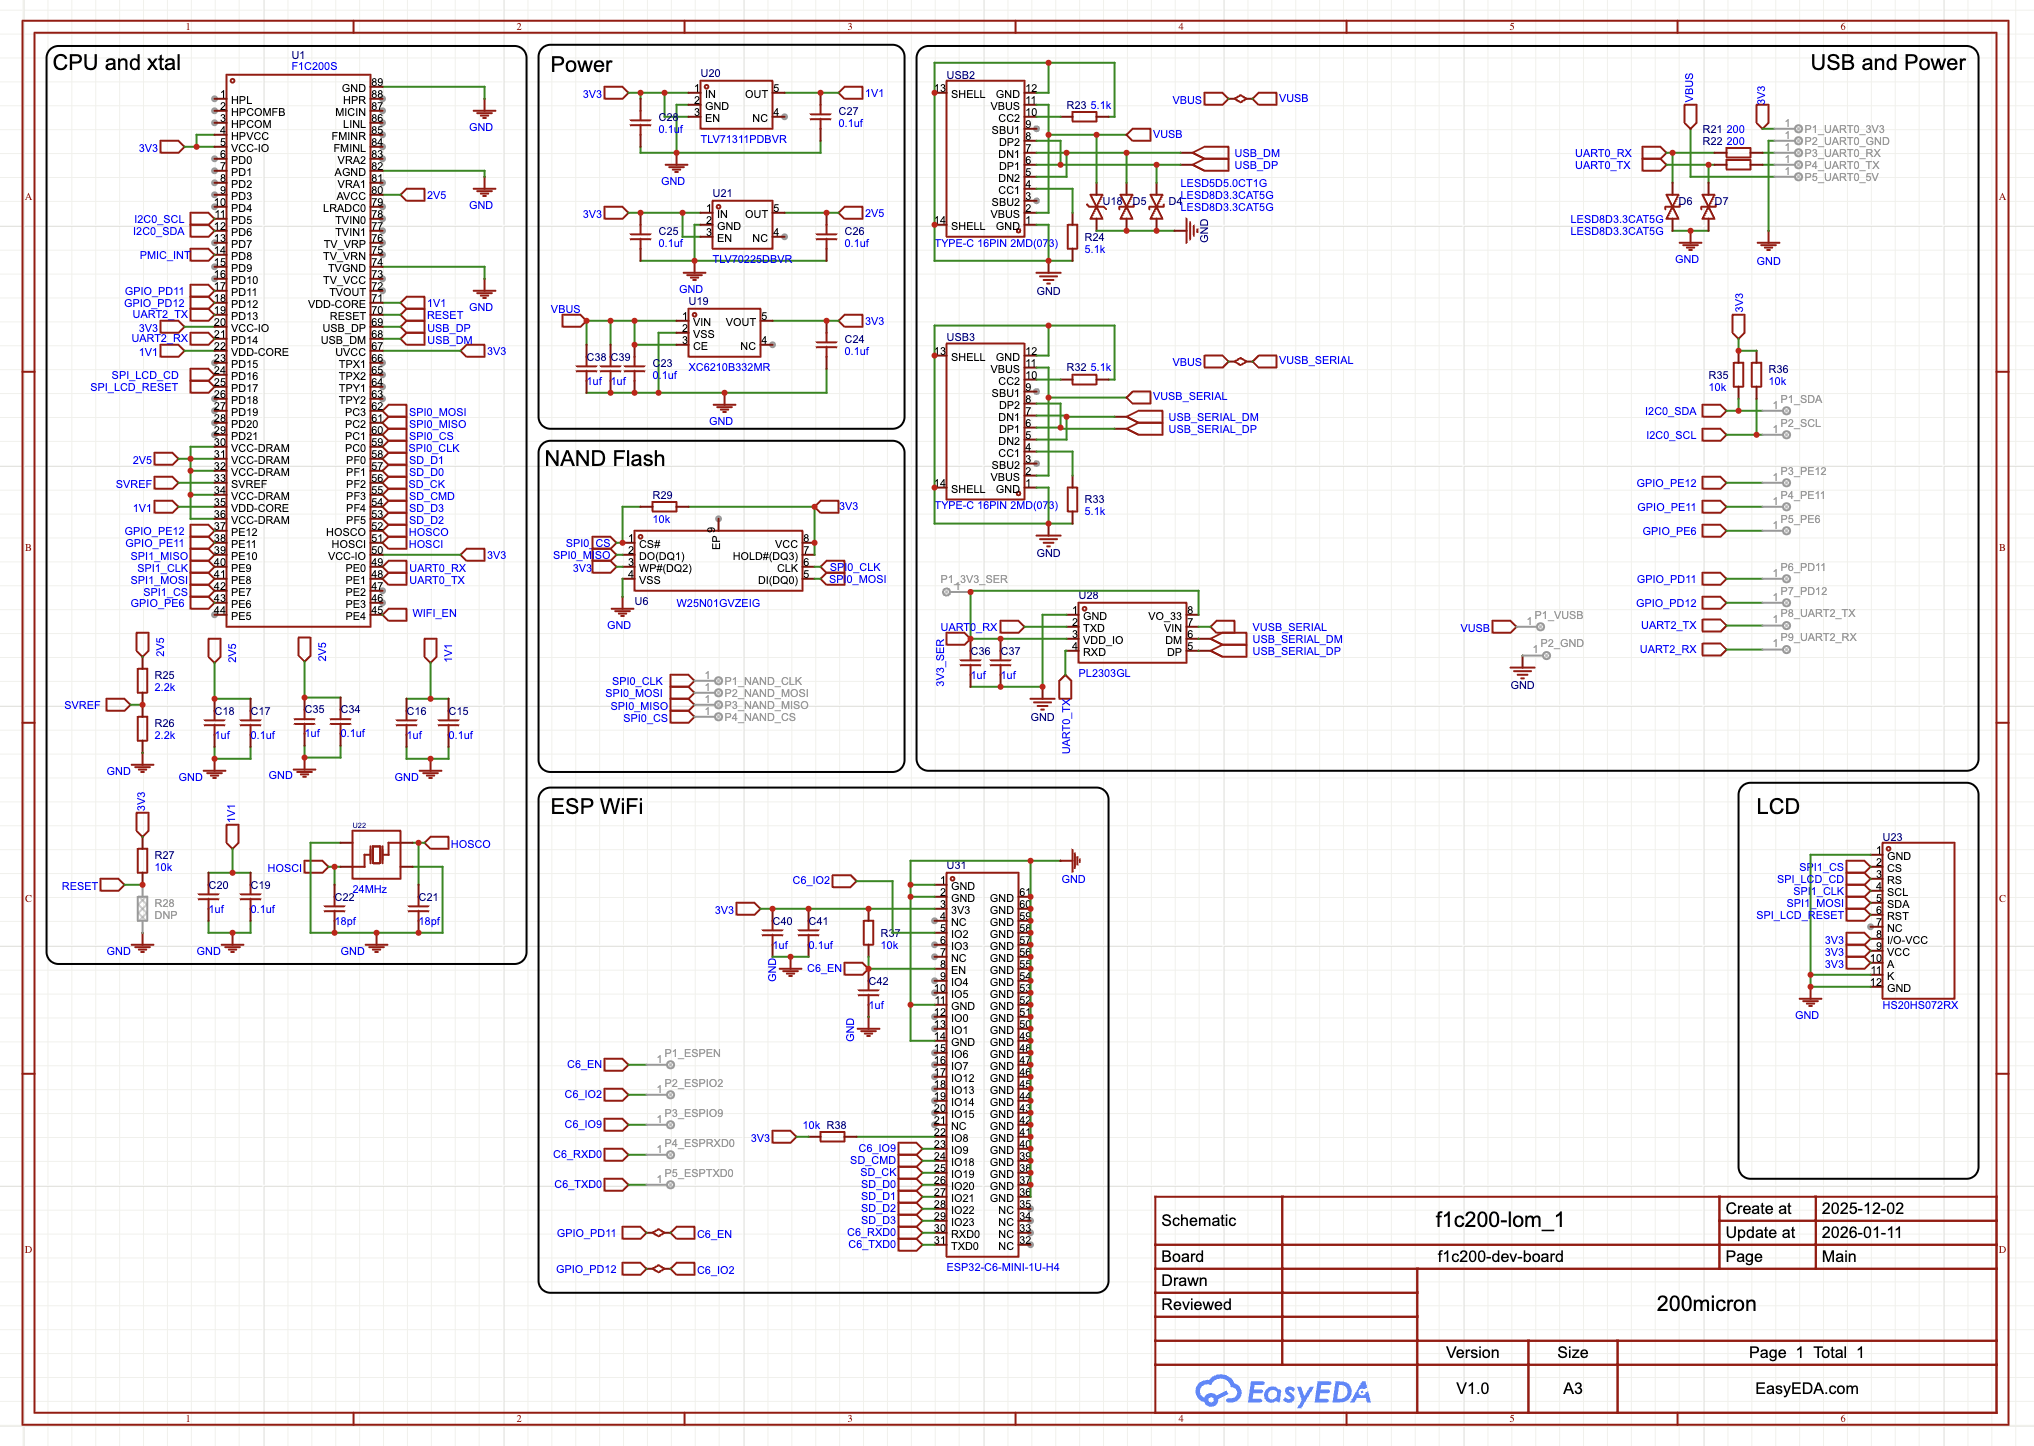
The first step of the design was choosing all the critical components. The star of the show here is the Allwinner F1C200s, a SiP (System in Package) with a 1GHz 32-bit ARM CPU, 64MB of RAM and many other useful peripherals. The fascinating and rare part of this chip is that it is hand-solderable, has mainline Linux Kernel support, and costs less than $5 USD in low quantities. It may well be one of only a handful that have all these characteristics. I then chose to pair it with a 128MB NAND flash chip for storage and an ESP32-C6 WiFi and Bluetooth module. These specs are not impressive by modern standards, but they are much faster than most microcontrollers and more than enough to run a full operating system with multitasking and countless other benefits.
After choosing the key parts, I structured the rest around multiple reference schematics available online using similar chips and created the power circuitry using LTspice simulations while following a few online tutorials. With the schematic complete, I layed them out and routed them a four-layer board that was set up to be manufacturing on OSHPark’s 4-layer Prototype production line using LCEDA and KiCad. Everything was intentionally placed on a single side of the board so that it could be assembled without any expensive machines or reflow ovens, only a $30 hotplate was necessary. All parts except for the CPU itself were chosen to be readily available in the US market and (if possible) manufactured by American companies, leading to it costing less than $100 USD for 3 boards worth of materials!
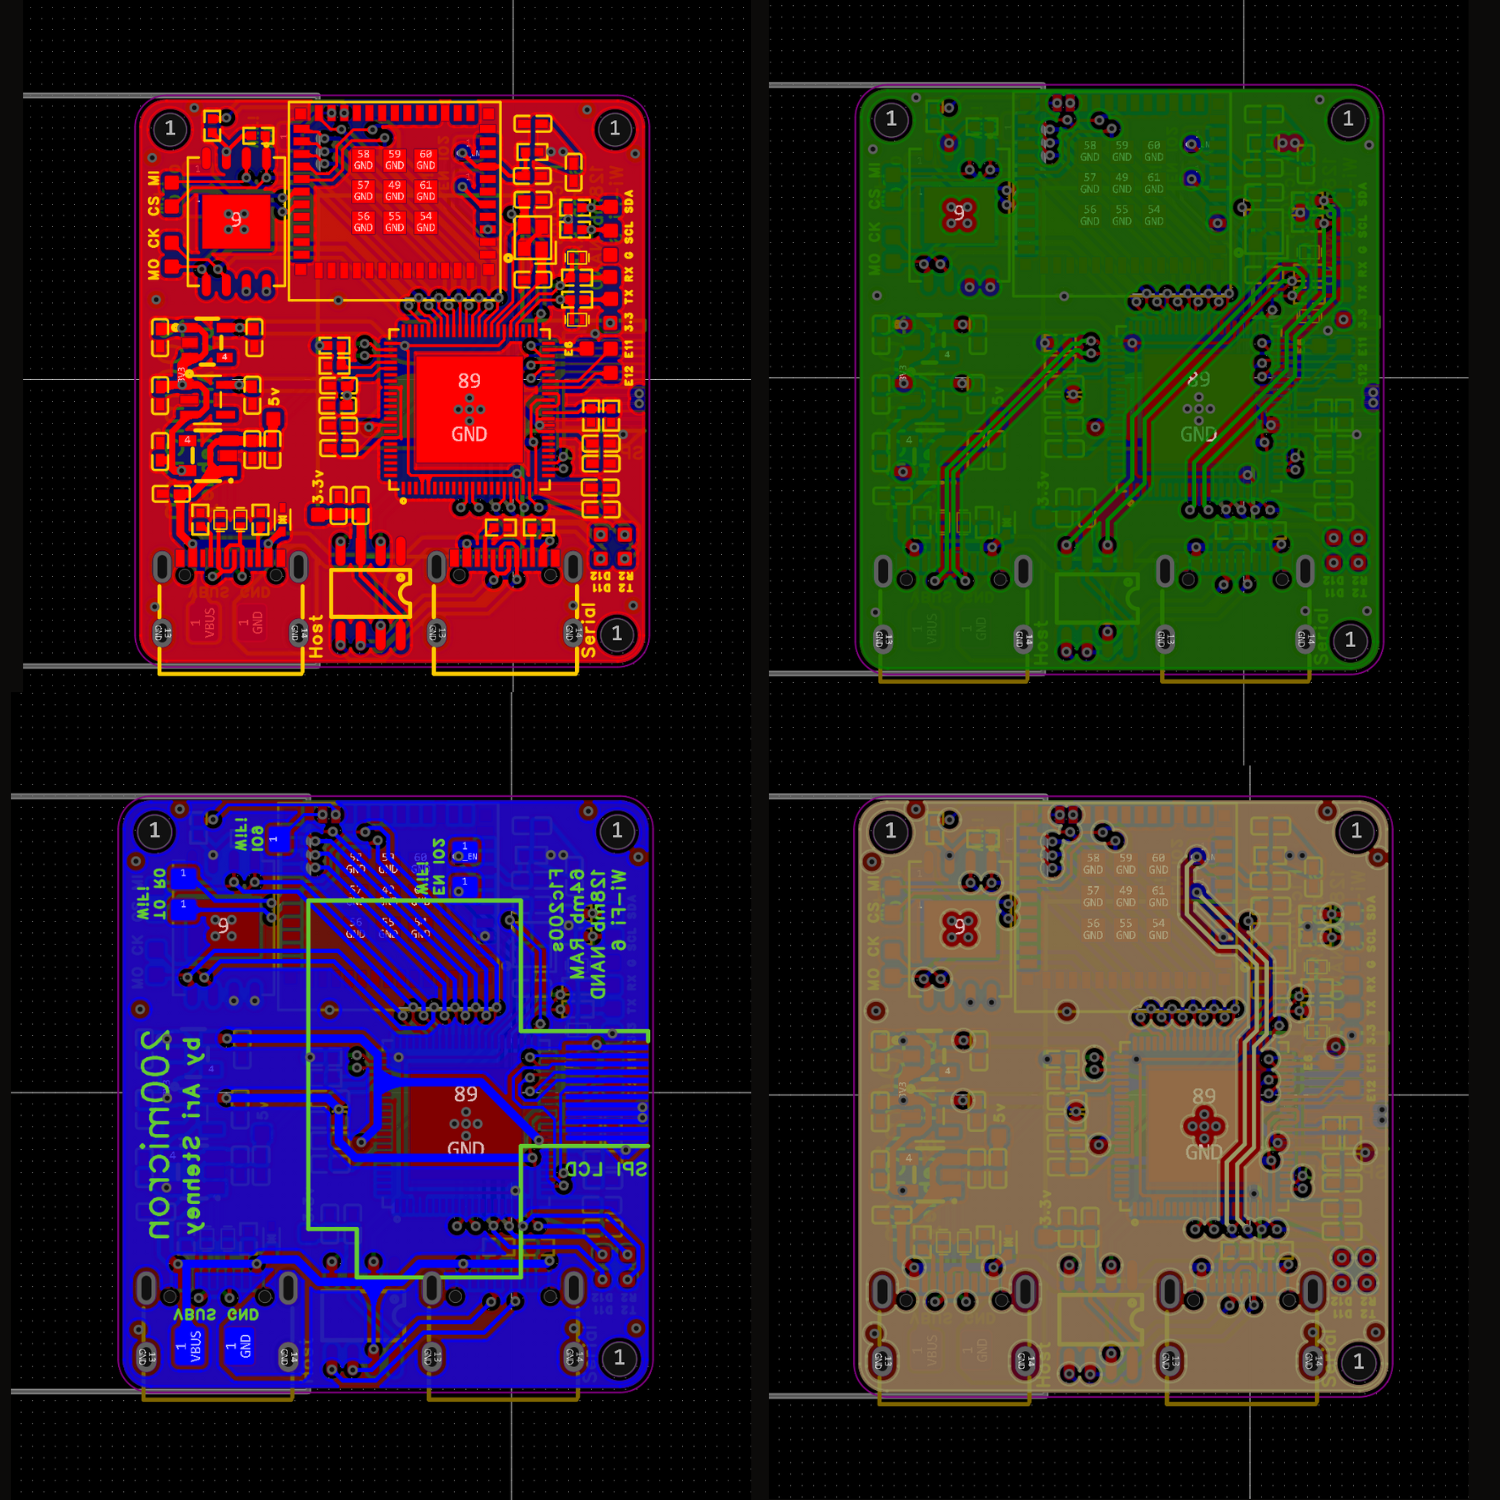
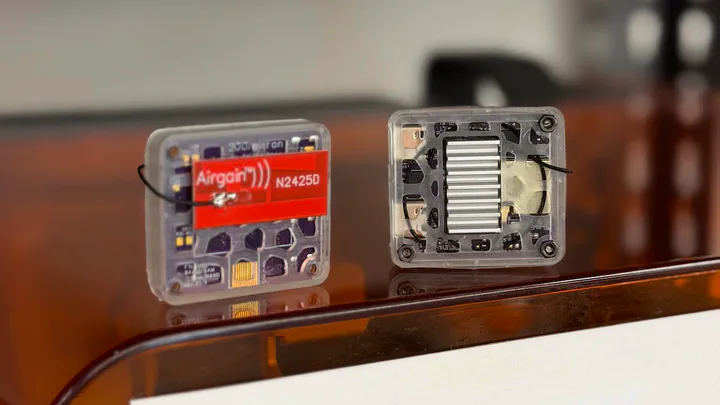
The final board has minimalistic but complete IO with two USB-C ports and a full set of GPIO pins accessible through solder pads. The first USB-C is for power, debugging, and serial console communication, and the second USB-C is connected directly to the CPU’s host bus to communicate with peripherals like USB sticks or keyboards. As a little cherry on top, I used the Form 4 Resin printer to create a durable case to hold the board and its WiFi and Bluetooth antennas and would make it easier for me to throw this in my backpack or pocket and use it anywhere.
Build - Learning manual PCB reflow!
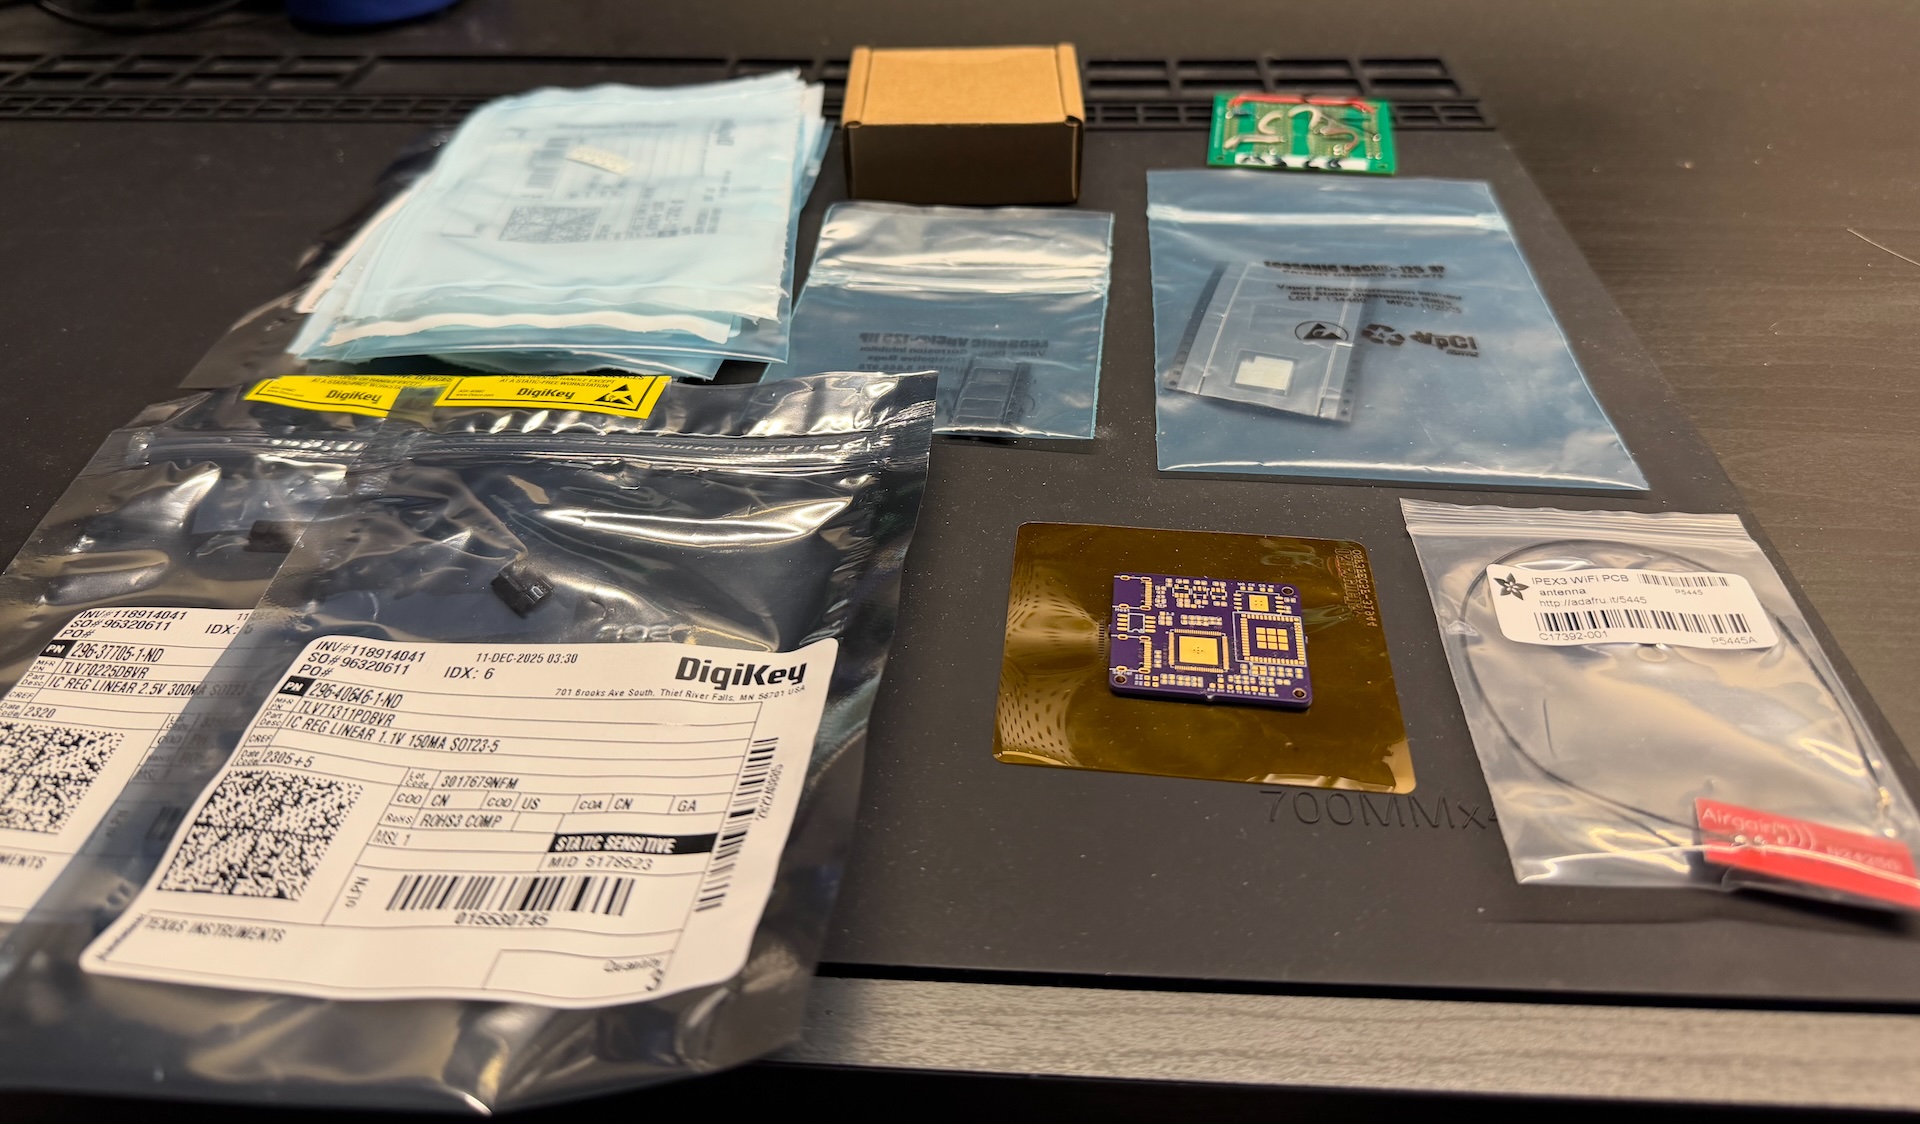
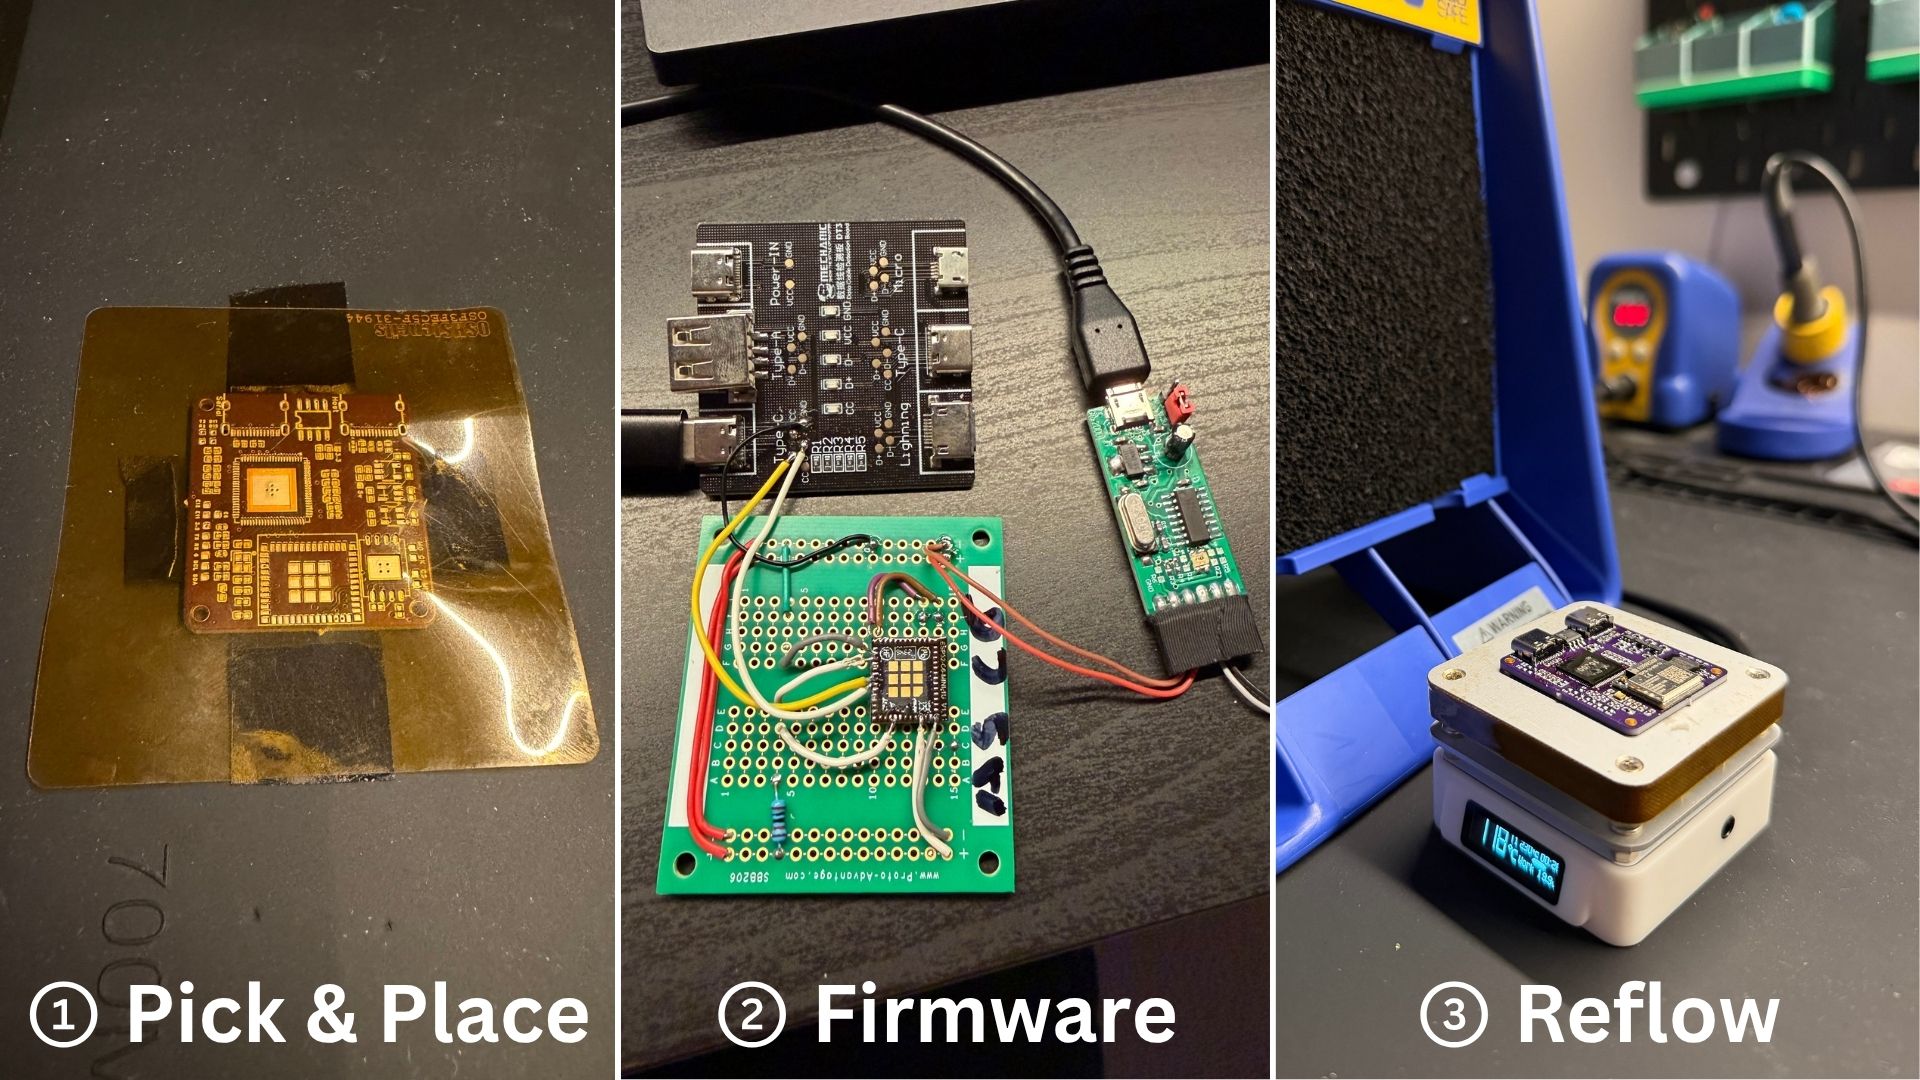
Once all the parts arrived, I needed to hand-assemble the board and reflow all of the surface mount components. I created a Polyamide stencil using the ProtoLaser LPKF available to students at the Hive Makerspace, this allowed me to spread the solder paste properly before placing all the 0402 components in their places using tweezers. This process seems tedious, but after a few boards it can be completed in about an hour. After all other parts are placed, the WiFi module can be programmed in my home-made serial jig to allow it to communicate with a Linux Kernel driver and can then be placed onto the board and covered in flux with the rest for the final reflow step on my hotplate. Once reflowed, the board is then be soaked in Isopropyl alcohol for 30 minutes and cleaned with a toothbrush before testing.
Software - Creating a good SDK
Once the board worked, I had to create a software package to test and use all of the most important board features. After some research, I settled on using Buildroot - an embedded Linux distro that can be customized and built from scratch in a modular way. There were already Buildroot patches out there for the Allwinner CPU that allow critical peripherals to function, and a driver for the ESP32 WiFi module could be included with a one-line change in the configuration. This made it sort of a no-brainer, but it was not possible without some level of difficulty. After three full days of fixing compilation errors and adding neccesary packages to the buildroot configuration, I finally had a working image that could be written to the NAND flash and would boot properly.
I continued adding to this image and can now connect to GT WiFi, download packages and code from the internet, compile C code on-device, and run Python natively along with many other packages. This is likely the biggest advantage over a microcontroller - standardization and compatability. So far, I have tested around 10 languages on this board, and can easily find standard Linux libraries that will work even if they don’t explicitly support the Allwinner CPU.
Test - What can it do?
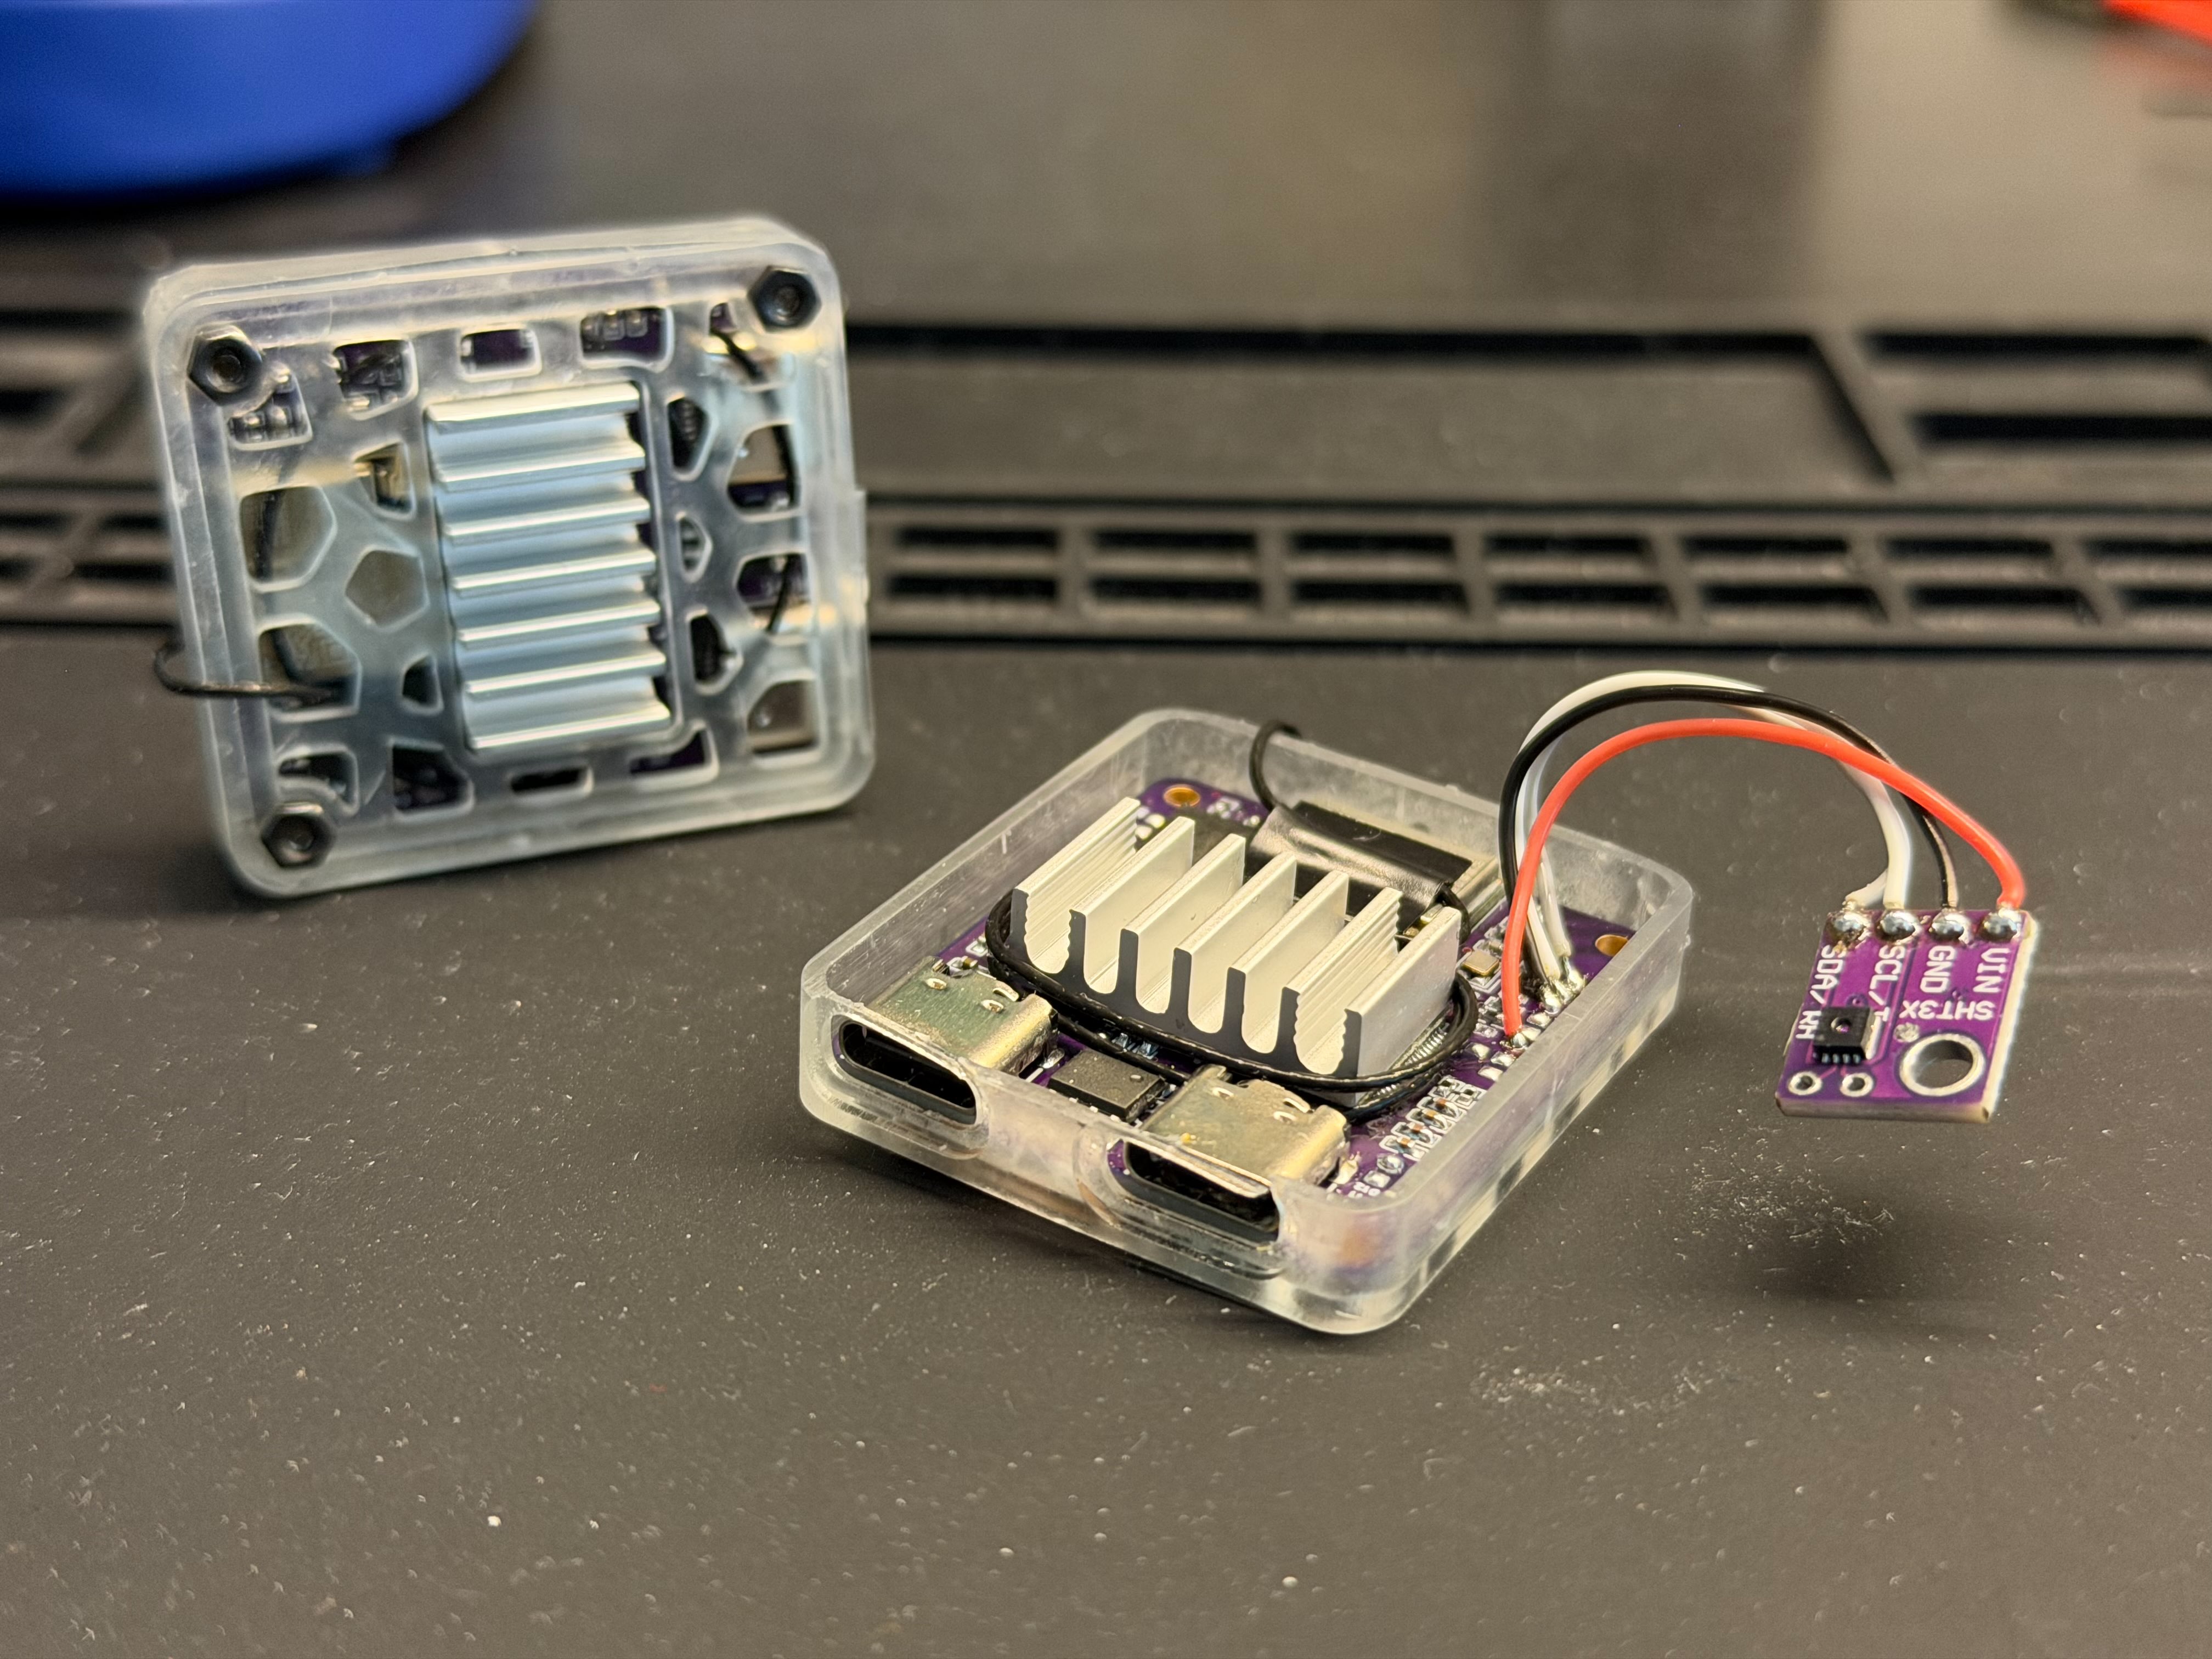
With all of this work done (and believe me, there is so much else that was not touched on here), I wrapped up the project by creating a few quick tests that demonstrate what this little device is capable of. The low level nature of working directly with hardware combined with the high-level compatability provided through Linux makes this a really fascinating platform that can do things that are difficult even on a Raspberry Pi, like interacting directly with sensors from a language like Go or Python. These demos only touch the surface of what could be done (and what I will use this for in the future).
Conclusions
Despite many roadblocks along the way, this project was ultimately very successful. It showed me the benefits of working with well-supported parts, and taught me that finding components to use in hardware also requires publically available English documentation and software support to go along with it. At the end of the day, every single feature on the board works completely from within the operating system: WiFi, Bluetooth, GPIO Pins and related communication protocols, the console, and more.
This project was overwhelmingly valuable in terms of skill-building. Coming away from this I am extremely confident working with Buildroot and creating portable cross compilation environments with docker, both of which are industry standard tools and practices. On the hardware side, I became much more familiar with high-speed/constrained routing in KiCad, simulation work for power circuitry in LTspice, and overall exercised myself to rapid prototype and prepare to manufacture this product. Along with personal benefits, I believe this project also shows immense potential to be a starting point for open-source single board computer hardware and could be a valuable educational tool for classes like ECE3058 and ECE4180. All hardware and software is open-source and available right now on GitHub below:
| Links & Extra Info |
|---|
| PCB and CAD |
| Buildroot Linux OS |
| Interactive Setup Tool |
| Rust Project Template |
| Go Project Template |